System Management - Proxmox
Is the host operating system environment that contains all system applications. Promox's role is to help customers backup data, operate and manage systems and virtual machines...
Login to Proxmox
- Step 1: Customers Access IP address: http://10.0.0.10/board -> Proxmox

- Step 2: Enter Username and Password -> Login
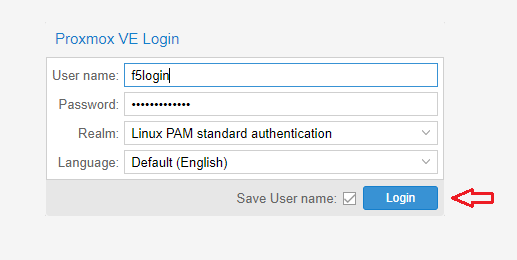
- Step 3: Successfully logged in, the Proxmox interface appears
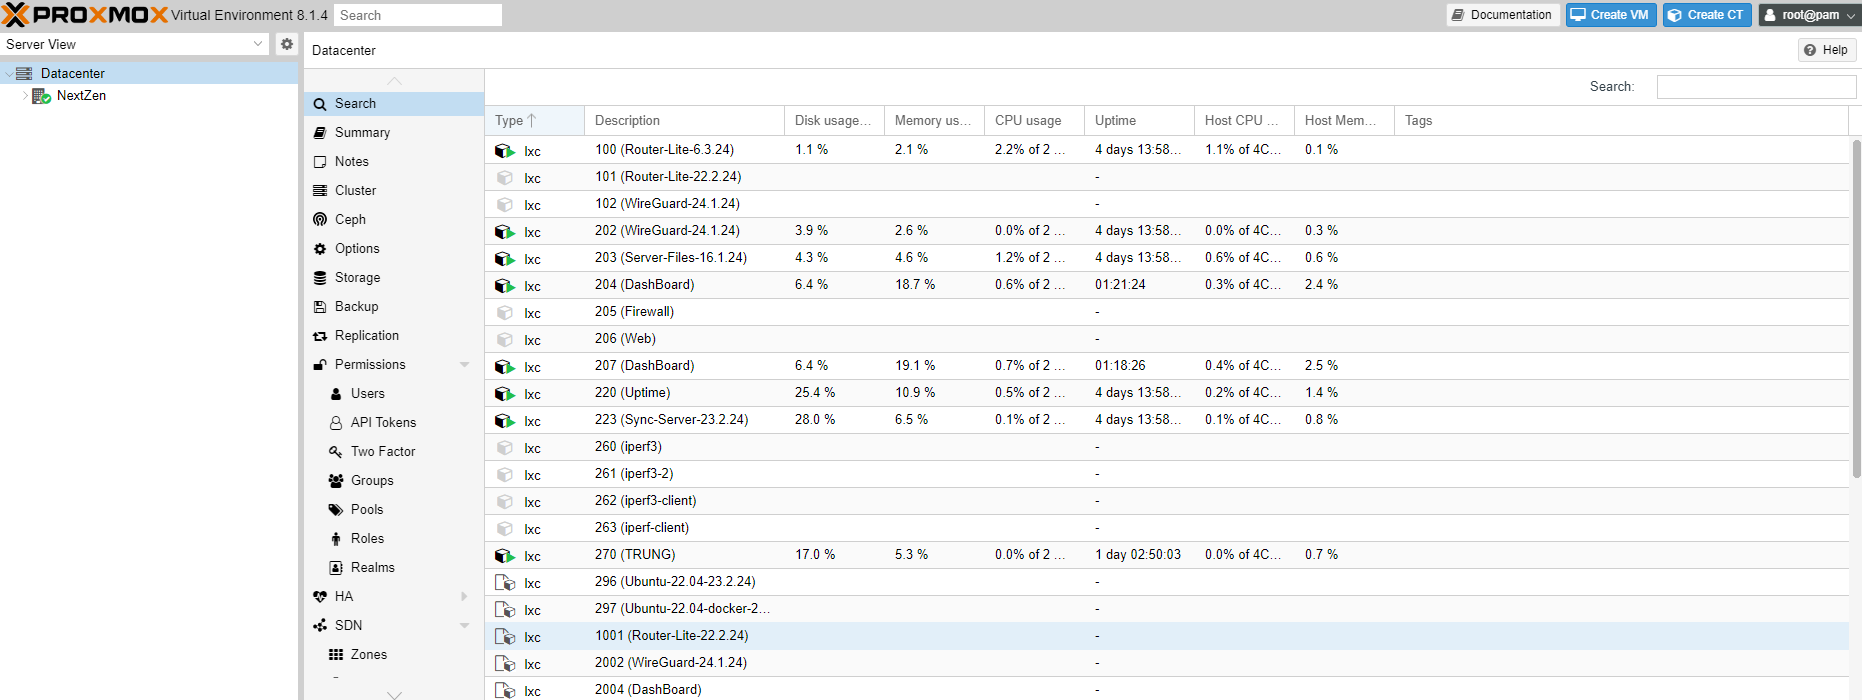
Virtual machines running and services in use
- Step 1: Select ↓ Datacenter -> ↓ NextZen -> The interface displays running virtual machines.
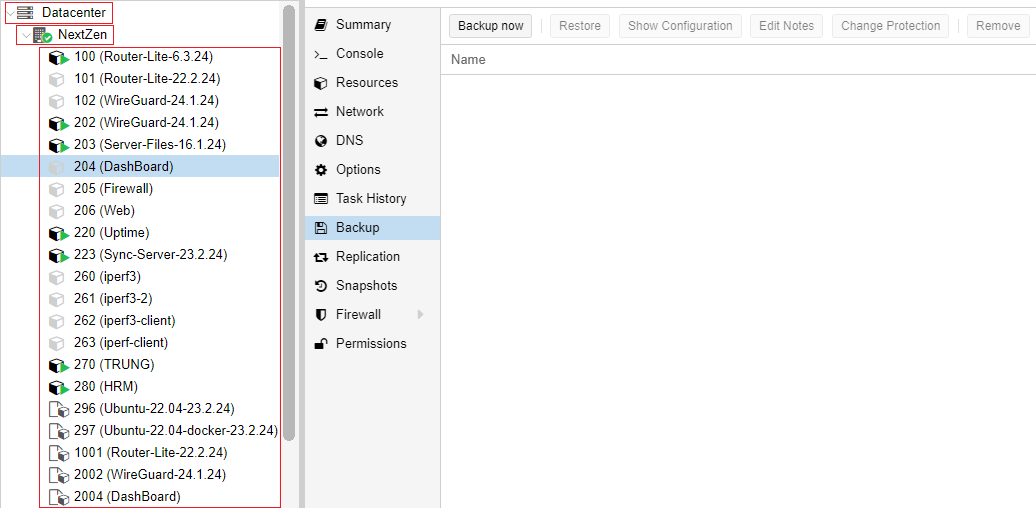
The 3-digit machines are running versions*
4-digit machines are machines that contain original, fixed, unchangeable data
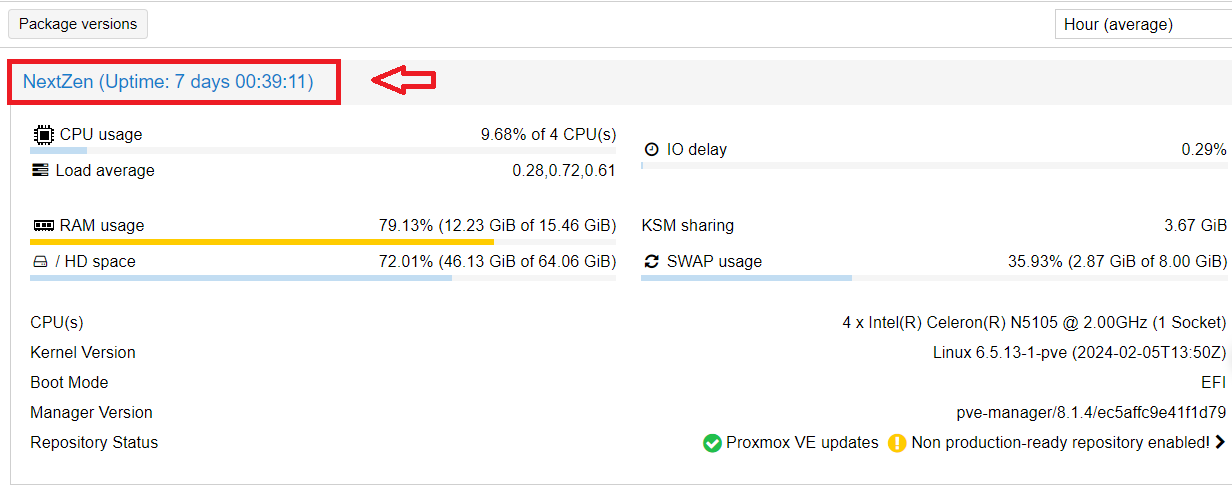
- Step 2: Select NextZen -> Summary -> Show all resources in use of the system

For example: The system has been in use for 4 days
Backup data
Data backup
- Step 1: Choose any virtual machine (ex: Router-Lite-101)
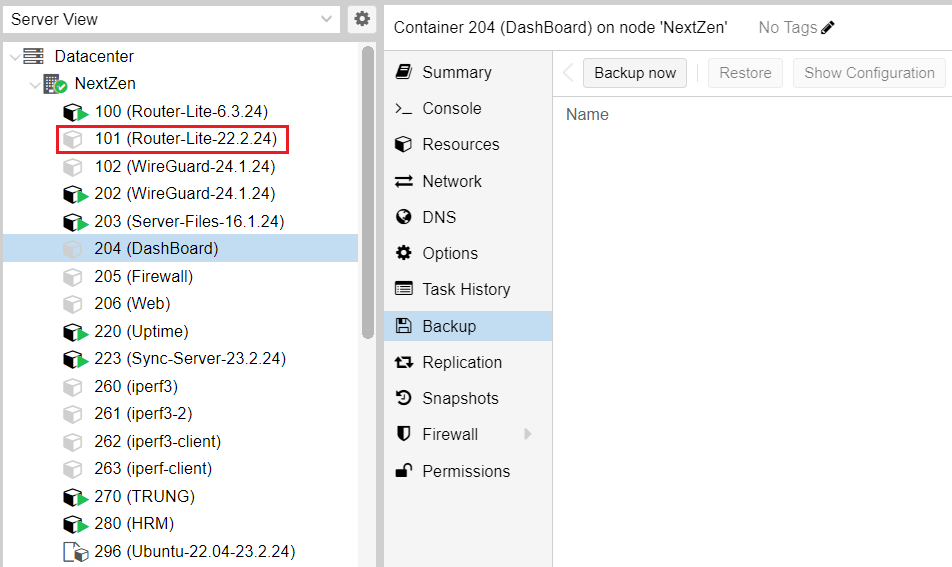
- Step 2: Select Backup -> Backup now

- Step 3: Select Backup
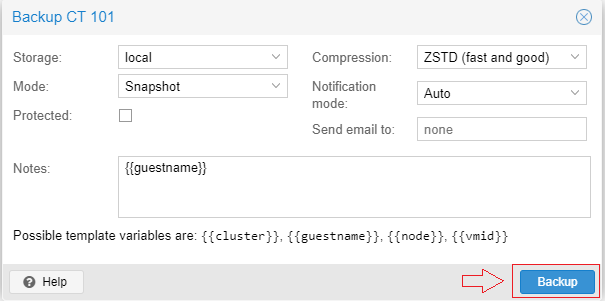
Immediately back up this entire machine at that state and time. And if you want to go back to that point, do the following:
- Step 1: Select local (NextZen) -> Backups-> Select that computer at that time
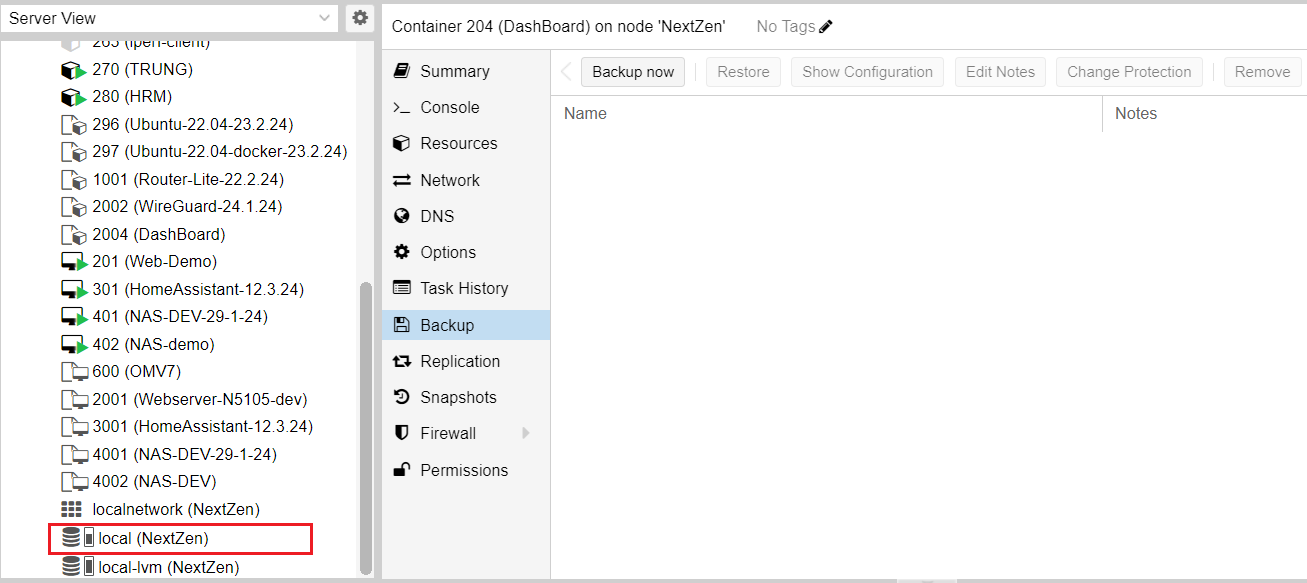


- Step 2: Select Restore -> Restore

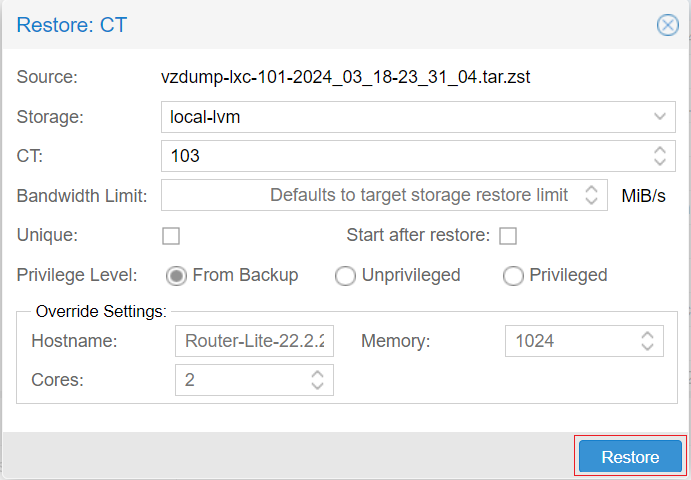
That machine will be restored.
Purpose: Proofread errors and create backups for customers
Return the device to factory defaults
- Virtual machines with 4-digit version (Ex: 2003, 2004) are the original data files of the software, while virtual machines with shortened version of 3 numbers (Ex: 2003-> 203) are the current running version, When you want to return to the default, you just need to delete the currently running version and clone the 3-number version into the corresponding 4-number version
- When the customer wants to return the device to its original state
Ex: Return Dashboard to default - Step 1: Select 204 (DashBoard) -> Select Stop
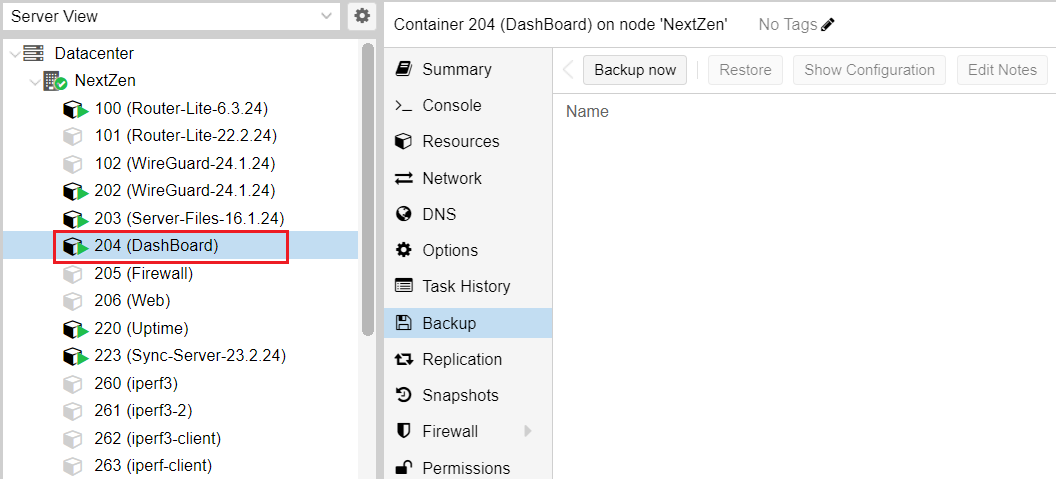

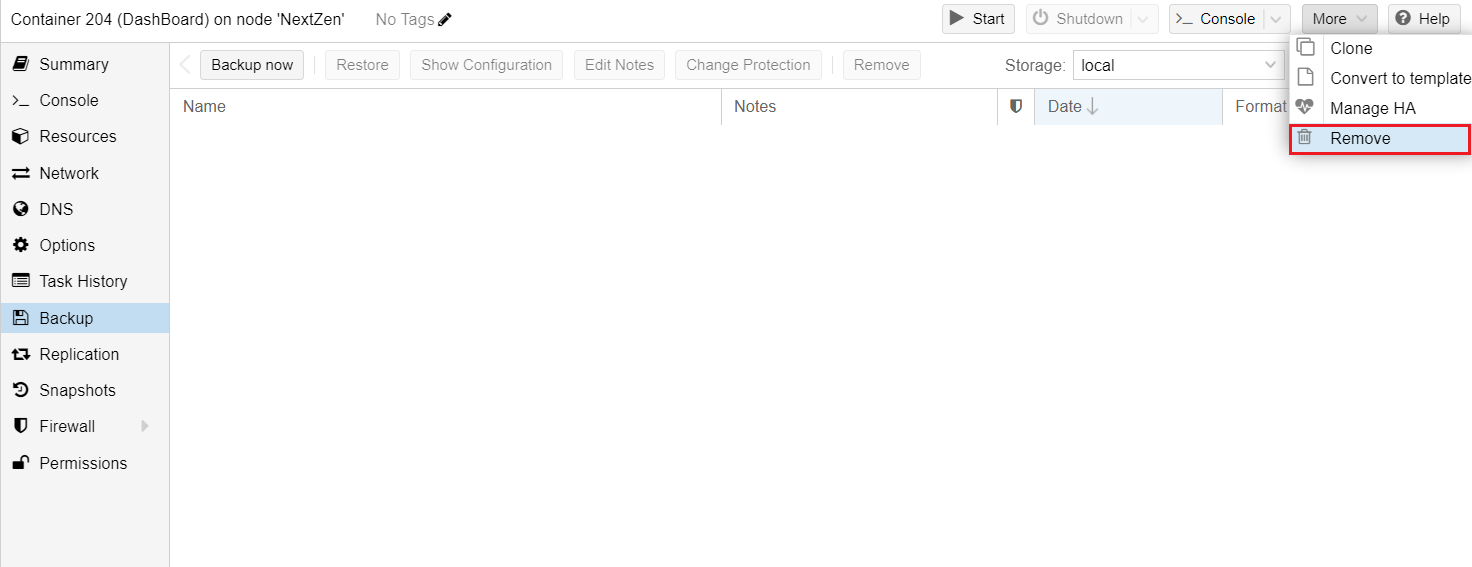
- Step 2: Then delete DashBoard: Select More -> Remove
- Step 3: Enter confirmation ID and select to delete data -> Remove
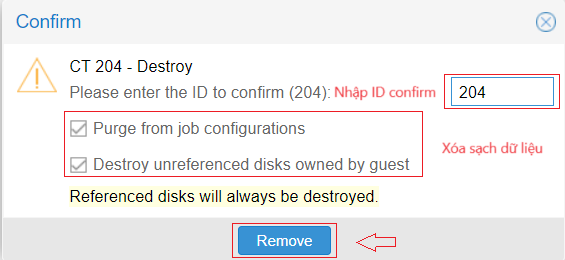
After removal, the 204 device's data has been completely erased from the system
- Step 4: Click the device 2004 (DashBoard)
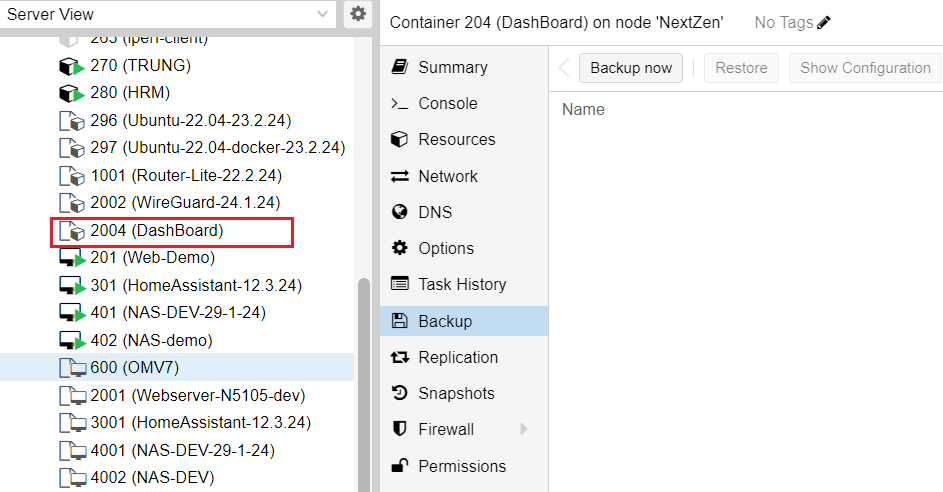
Note: Devices with 4 numbers contain backup data to restore the devices to default
- Step 5: Left click -> Clone
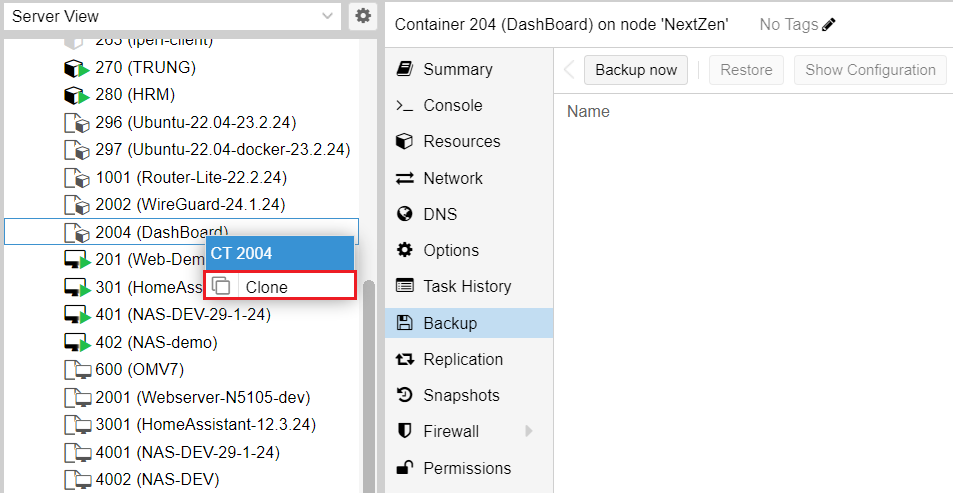
Then set the ID for the machine (Ex: 204) and press Clone
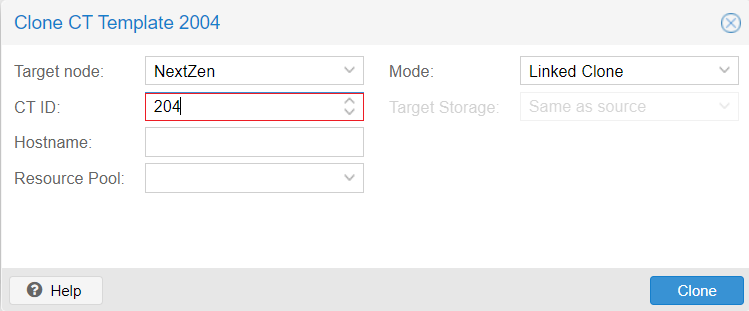
After pressing Clone, a completely new DashBoard appears.
- Step 6: Select Start to launch 204 (DashBoard)

After DashBoard is launched you can visit http://10.0.0.10/board and you will see the Dashboard has restored to its original state.
Create multiple machines to use the service
Create a machine that runs parallel and independent of other machines
Ex: Create 1 more machine running DashBoard
- Step 1: Click on the device 2004 (DashBoard)

- Step 2: Right click -> Clone

Then Enter ID (Must not be the same as an existing device)
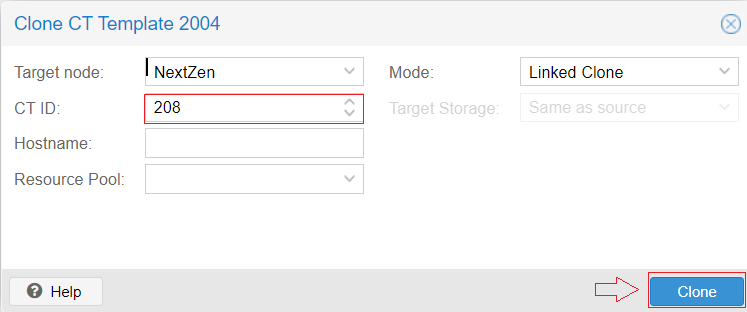
- Step 3: Change IP address: Select machine 208 (DashBoard) -> Network -> Select Network line-> Edit
Change IP address. For example change to 10.0.0.15
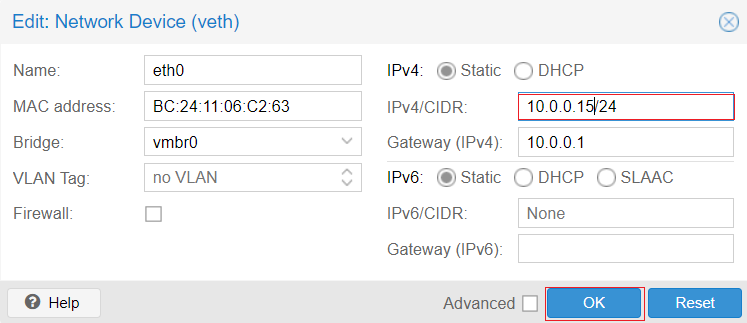
Then press OK
- Step 4: Select Start to launch the device and you can access Dashboard at http://10.0.0.15/board
- When the machine has been launched, it will display as shown below
